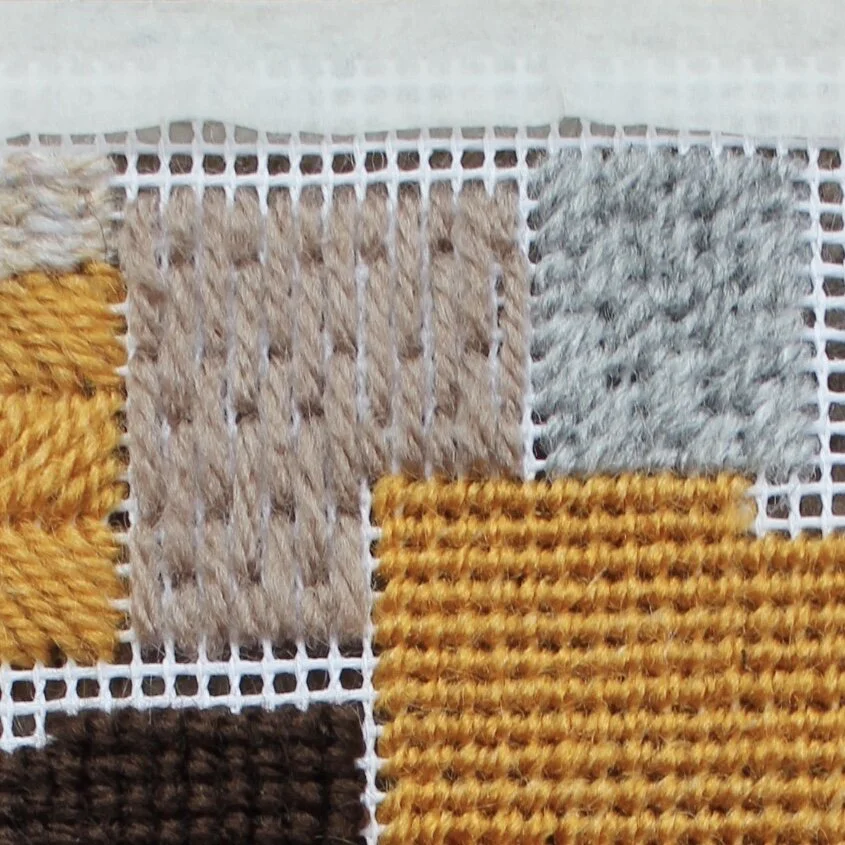
Brick stitch is simply rows of back stitch next to each other and staggered, like bricks in the wall.
Start by creating a row of backstitch (see here for a tutorial on backstitch)
To create the next row, start the stitch about half way along the first (B)
Complete the stitch, making sure the length of the stitch is consistent with the previous row (A)
Create the next stitch again about halfway along the row above (C) and complete the stitch (B)
This canvas work sampler shows tow different examples of brick stitches, the light brown shows a block of bricks using longer stitches. Whilst the grey section the bricks are stitched in a diagonal direction.
The close up of one of my intuitive embroidery pieces shows two further examples of brick stitch. Can you spot them? A light green section in the centre of the photo shows three long, thin rows, whilst just below this there is a mustard coloured triangular section where brick stitch is used more as a filling stitch.
Want to try this stitch? It’s one I suggest as part of my monstera kit.
Sign up to my email newsletter to get a monthly free embroidery pattern and a round up of Stitch Showcase blogs.


